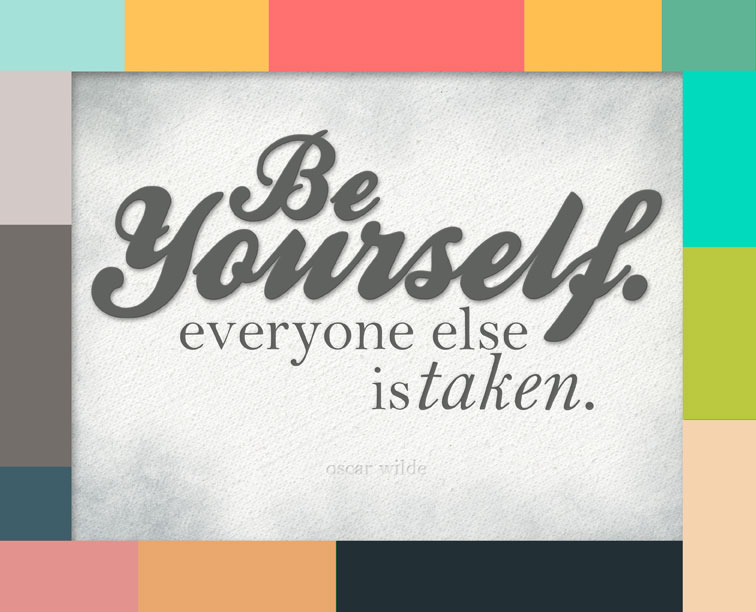
Hi friends! Wanting to customize your own version of the “Be Yourself” wall art? Well, today’s the day!

Click the image above to download the layered Photoshop file (97 MB).
Open in Photoshop. All of my instructions will be based on Adobe Photoshop CS5. If you have a different version of Photoshop, then you may have to adapt my instructions accordingly.

Look at your layers palette, and you will see something like this:

Start with the text layers. You will see that I have already “clipped” empty layers above the layers containing words. Those blank layers are called “CLIP PAPER HERE”. Open the file containing your paper and copy and paste it above the previously clipped blank layer. You’ll notice that doing so temporarily obscures the type layer you’re trying to affect. You just need to “clip” this new layer to either the text layer or above the blank “CLIP PAPER HERE” layer. Either is fine. Right click on the new layer and choose “Create Clipping Mask.” If your mouse doesn’t have a right click button, then click on the layer you wish to clip (Layer 1 in my example), then click the arrows in the upper right hand corner of the layers dialog box. A new window will open where you can choose “Create Clipping Mask.”


Follow the same procedure for all other text layers you wish to add a paper to.
The papers that make up the colorful border are simply shapes you will find in the layers palette in the group called, “Patchwork Frame Shapes.” Copy and paste your papers into the layers above each rectangular shape layer and “Create Clipping Mask” for each layer. Violá! You have done it!! Now it’s up to you to get it printed out, trimmed and framed. I sometimes like to get inexspensive frames from the second-hand store and paint them with bright colors, but any frame to match your decor will do!